HELP!
Part 2: Using the Risk Framework Setup
2.1 Risk Framework Setup - Terminology
- This tutorial guides the user through the Risk Framework Setup generating a knowledge base with a risk based hierarchical structure and subsequently customising this framework to a completed Loan Risk Assessment application. This first section aims to define the terms used in the dialogs of the Risk Framework Setup.
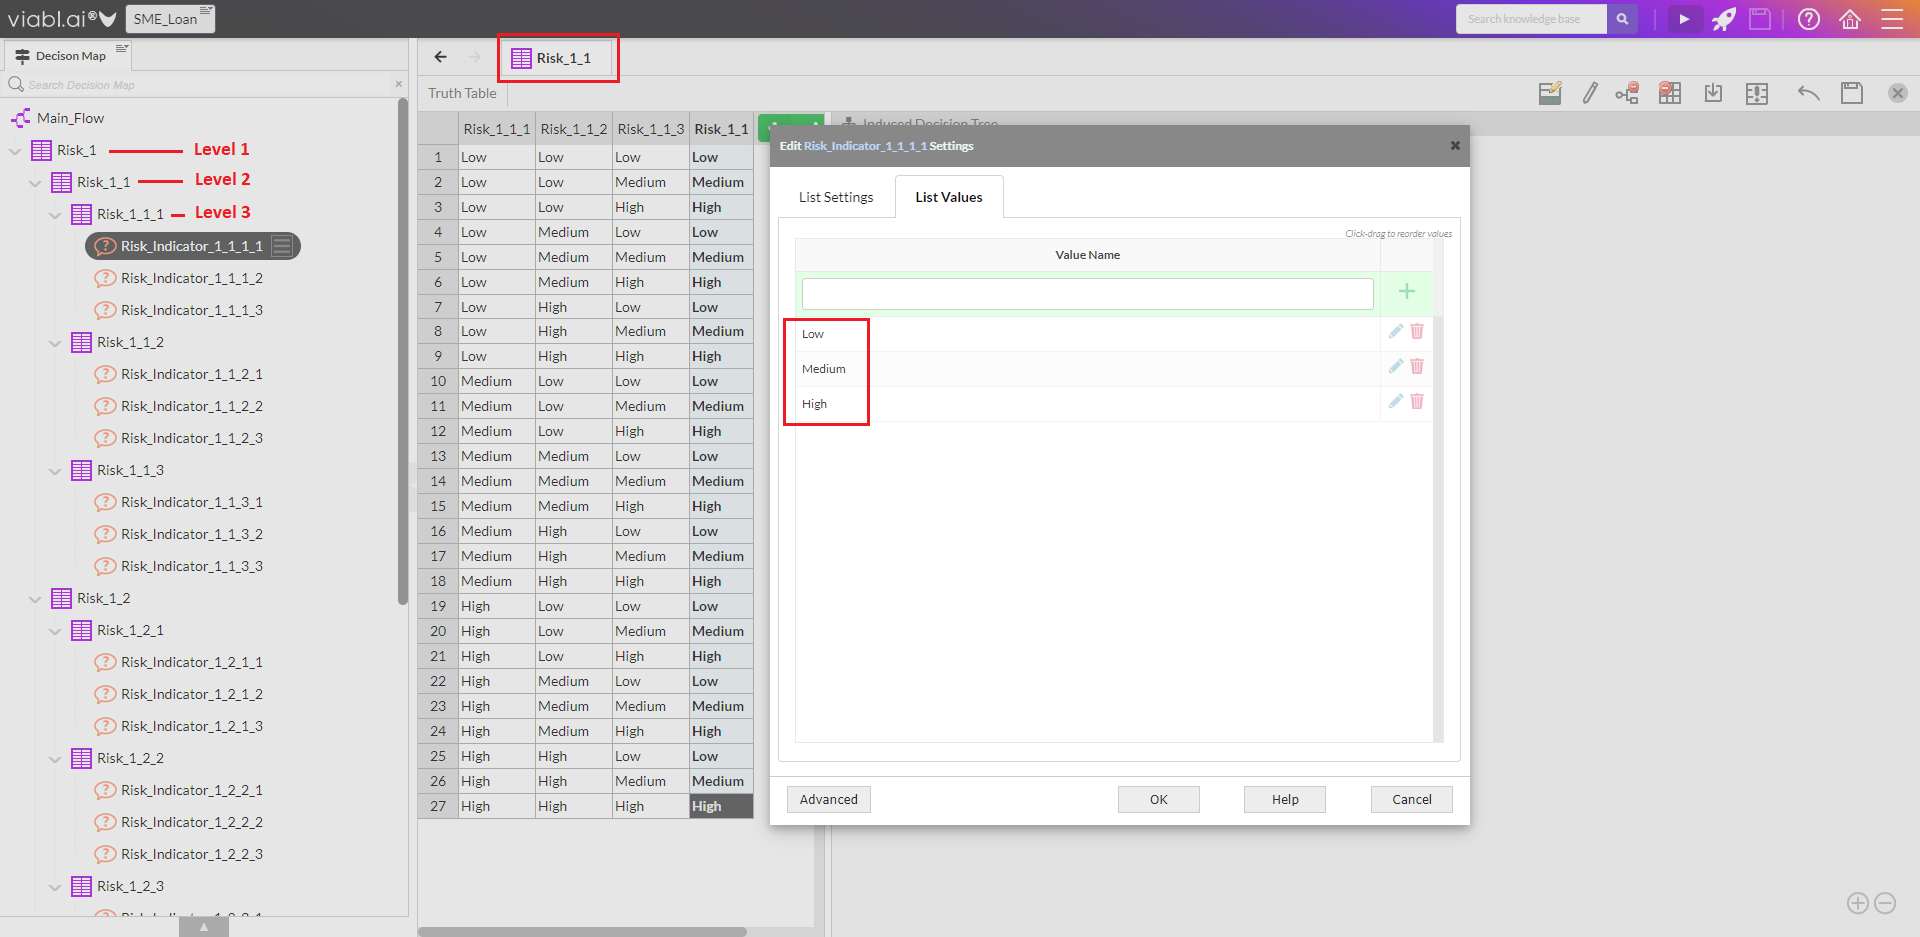
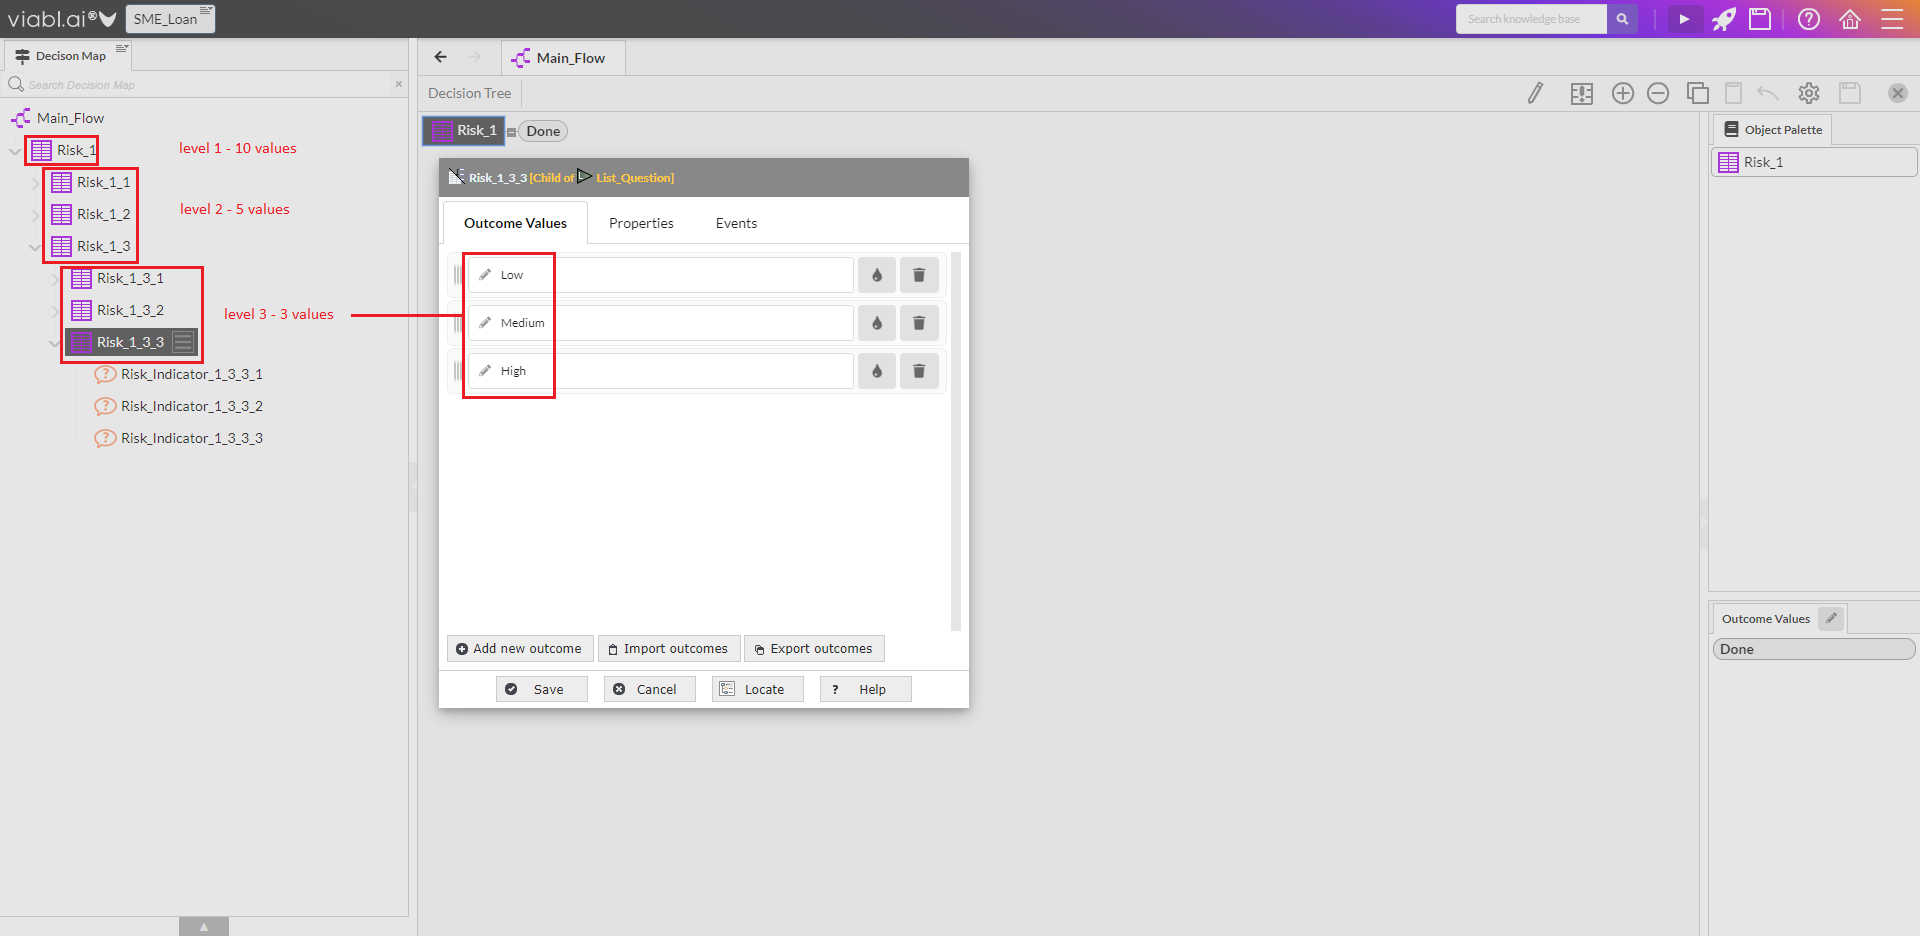
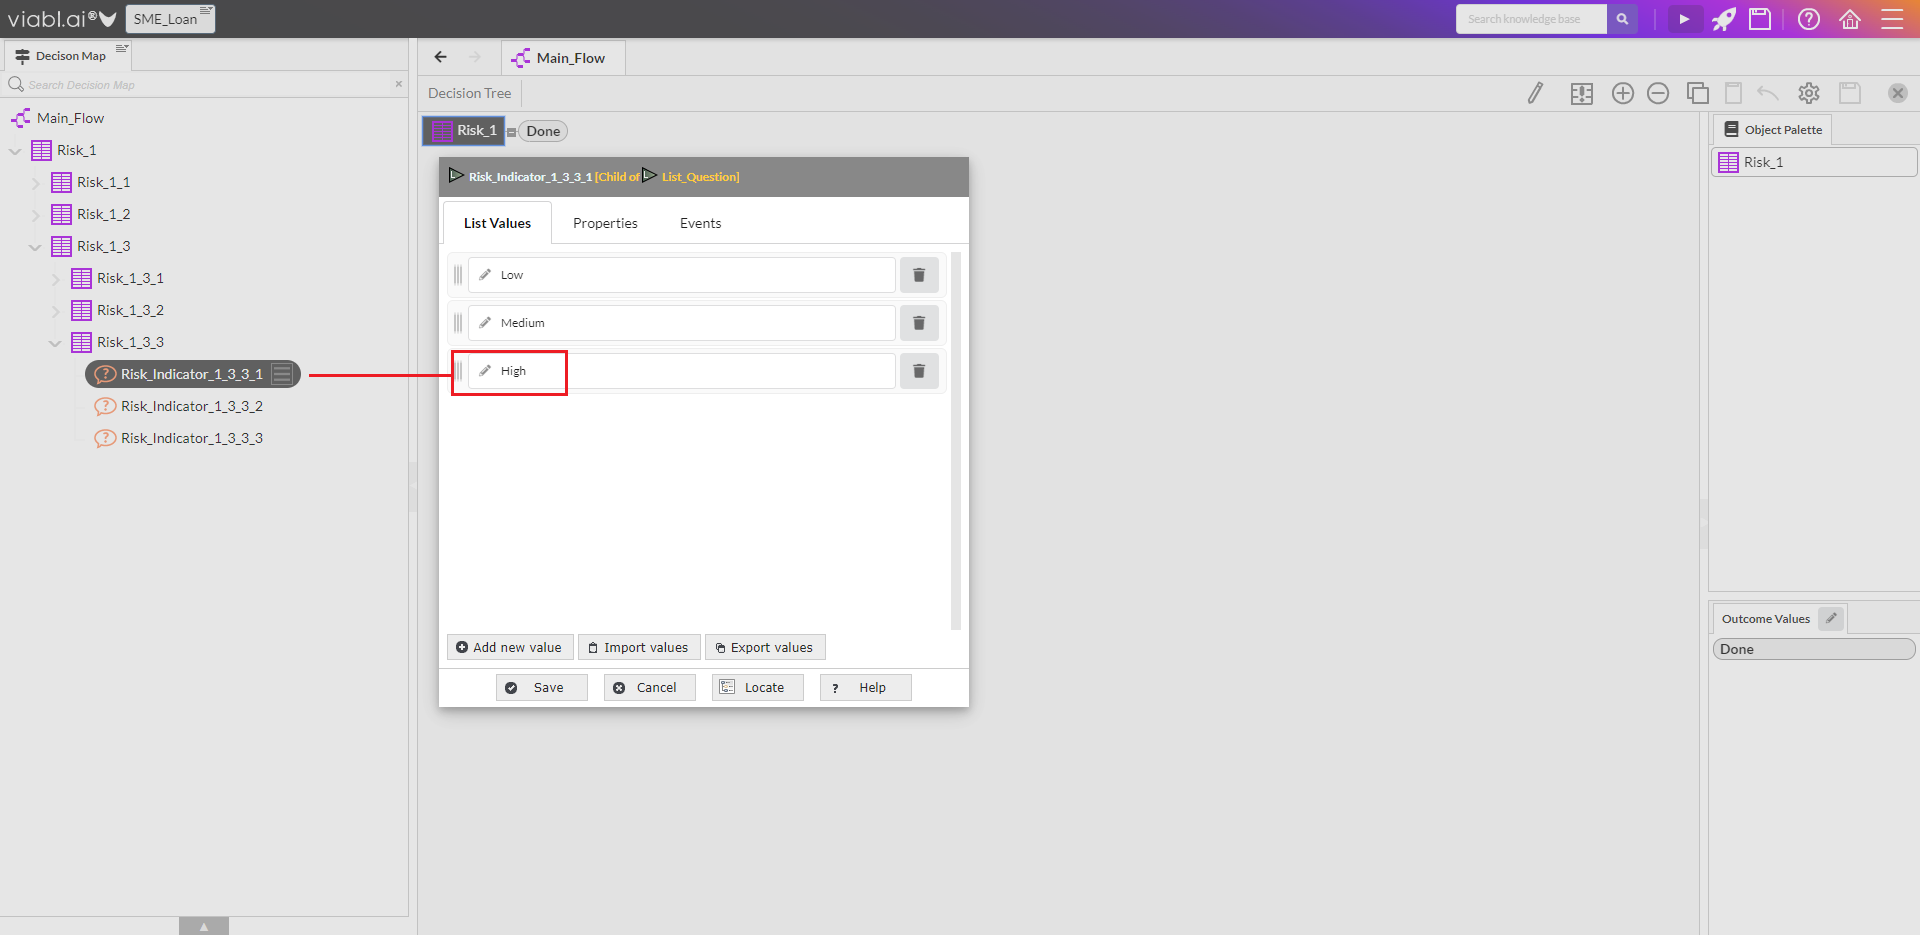
- The screenshot on the right shows the Decision Map of an example knowledge base produced by the Risk Framework Setup (but before customisation); the setup not only populates the Object Catalog with the various Aggregation Functions and Risk Indicators but links these objects together into a hierarchical structure.
- The number of levels and the number of functions per level are configurable during the Risk Framework Setup.
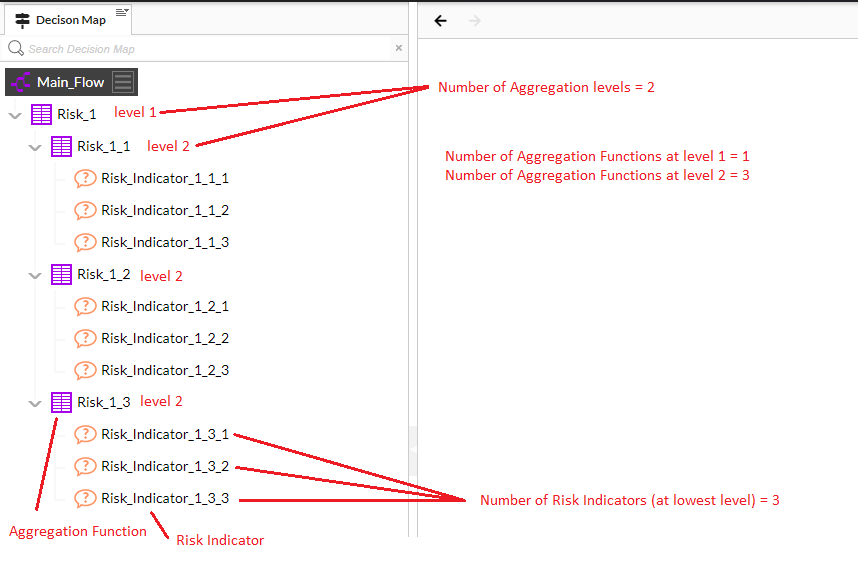
- The Aggregation Functions have a set number of values at each level and these sets of values are termed the Risk Rating Scale.
- The number of values and the text of the values are configurable during the Risk Framework Setup.

- The Risk Indicators also have a set number of values.
- The number of values and the text of the values are configurable during the Risk Framework Setup.
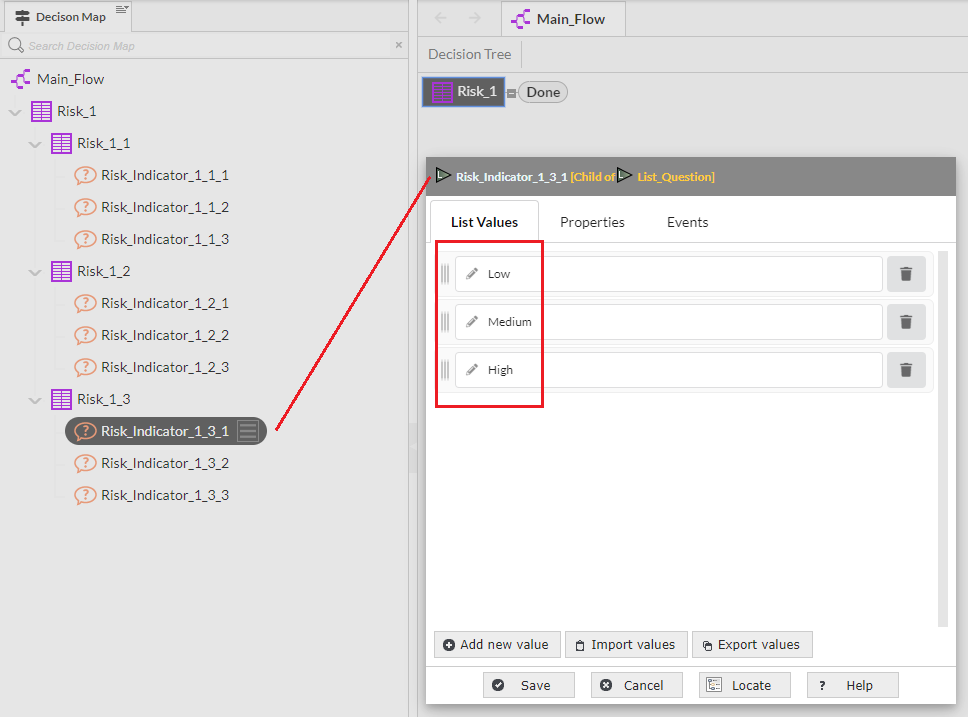

It should be noted that the Risk Framework Setup only produces Risk Indicators at the lowest level of the hierarchy, however if required Risk Indicators can be added/deleted later at any level of the hierarchy.

The Risk Framework Setup has a number of screens which are detailed in the following sections (2.2 to 2.8). For this SME Loan Risk tutorial please use the default settings for all the screens in the Risk Framework Setup - this point is reiterated in section 2.9.
2.2 Risk Framework Setup - Screen 1: Splash
- The initial screen is just a splash screen, you can cancel at this point and no application will be built, if you continue past this screen an application will be built at whatever point you exit.
2.3 Risk Framework Setup - Screen 2: Initial Configuration
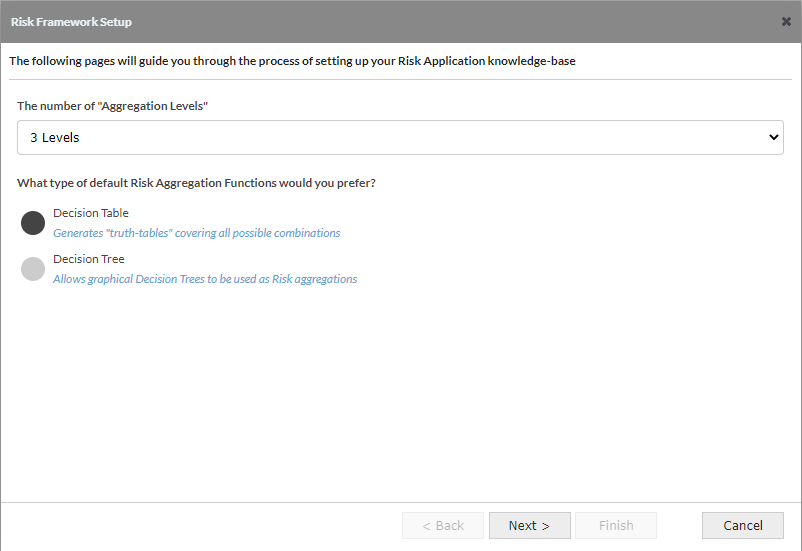
This screen has several configuration parameters that will setup the size and structure of your Risk Application knowledge base.
-
Aggregation Levels
- This defines how many nested levels exist in the application and has the main influence on how many objects will be created.
- The number of "Aggregation levels" - 1,2,3,4 or 5 levels
- Default value - 3 levels
- Example - In a 3 level application SME Loan Risk would be level 1, this would be determined by multiple level 2 risks of which one could be Business Risk, which in turn would be determined by multiple level 3 risks one of which could be Sales Risk.
-
Default Risk Aggregation function
- This defines the type of all knowledge objects created. It is possible to convert individual Decision Tables to Decision Trees and vice versa
- Aggregation function type - Decision Table or Decision Tree
- Default value - Decision Table

It is best to use Decision Tables as usually the top level would be a decision table. Decision trees are best used when there are many objects used to determine risk; this is because a decision table produces all the possible combinations and hence the number of rows in a table with many objects can be very sizeable and each row will require populating which could be a significant task.
2.4 Risk Framework Setup - Screen 3: Set Risk Rating
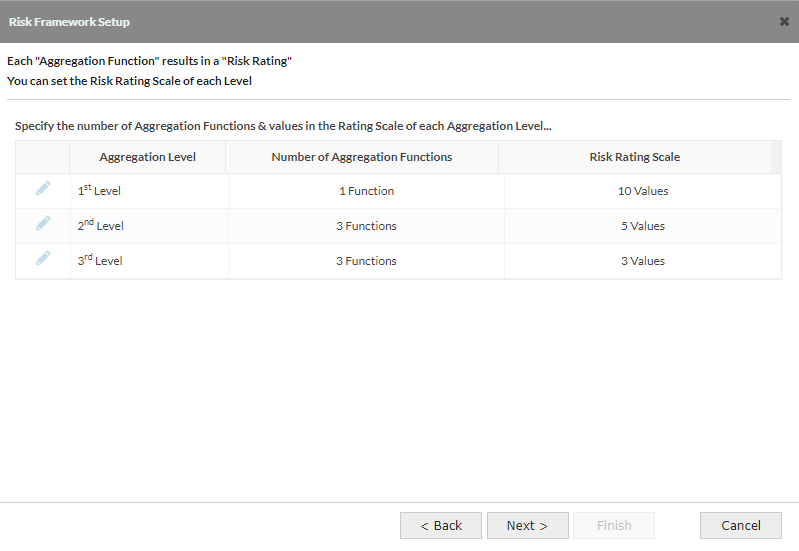
- Each Aggregation function results in a risk rating, for each level you can determine how many functions there are per level and the number of values in the rating scale for the functions at that level
- Default - 3 rows to represent the 3 aggregation levels, Level 1 has 1 function with a 10 value scale, Level 2 has 3 functions with a 5 value scale and Level 3 has 3 functions with a 3 value scale.

There will be a row for each level, with the number of levels being determined in the previous screen. The actual values within each of these scales are determined in a later screen. Each row can be edited to adjust the aggregation levels and/or the rating scale for that level.
2.5 Risk Framework Setup - Screen 4: Set Risk Rating Scales
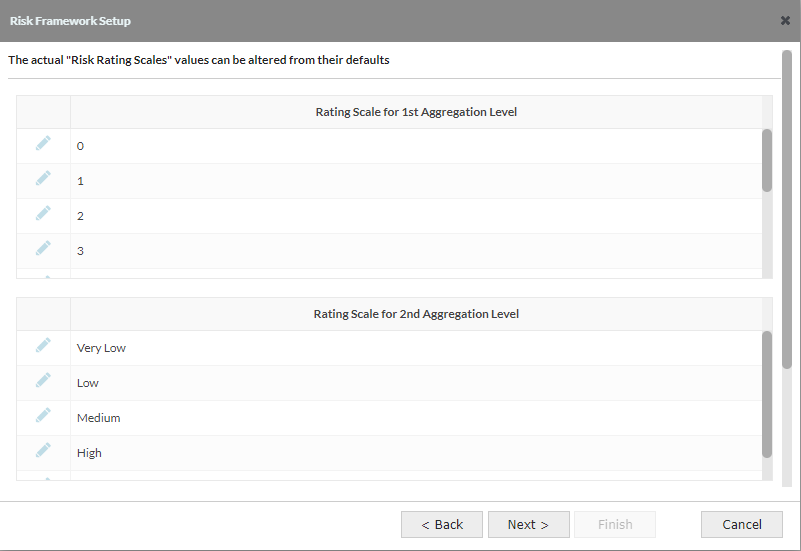
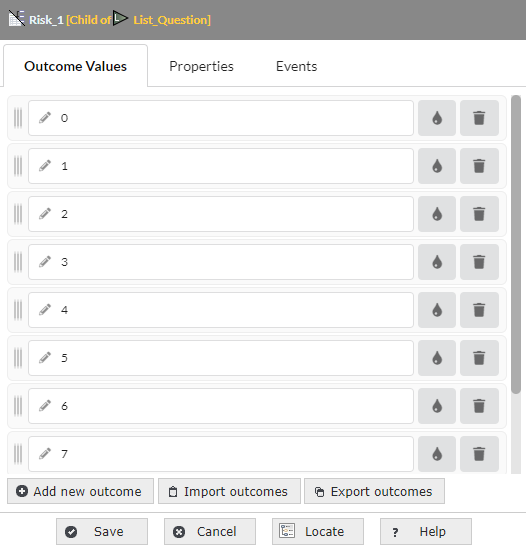
- The number of values in each scale for each level was determined in the previous screen, this is where the actual values themselves can be set (or the defaults used)
- Default - Level 1 scale values are "0" to "9", Level 2 scale values are "Very Low" to "Very High", Level 3 scale values are "Low" to "High"

When the application is generated, these values are the defaults for each function on each level, but it is possible to edit a specific function/object to have its own values, renaming, adding or deleting.
2.6 Risk Framework Setup - Screen 5: Define Risk Indicators
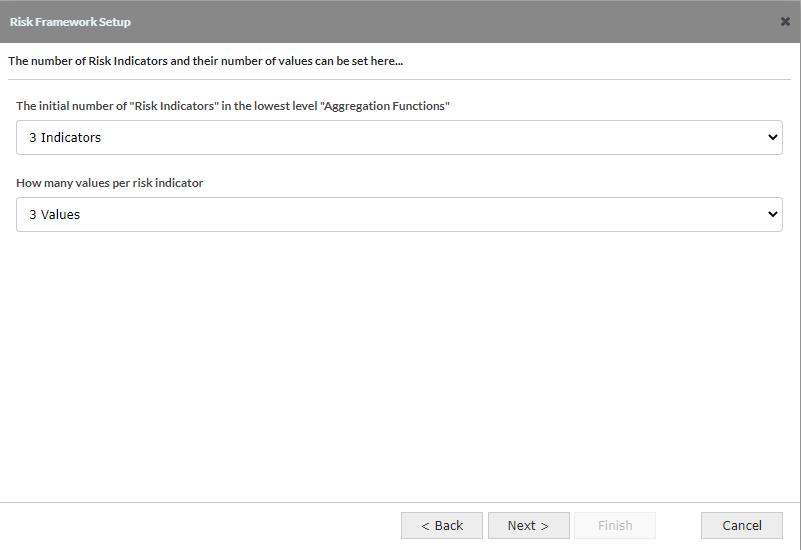
- At the lowest level, there are Risk Indicators. These are the base questions/attributes that define the risk at the Nth level (3rd level using the defaults). This screen is where the number of indicators and the number of values are configured.
- Number of Risk Indicators: default is 3 but can select 5
- The final level of Risk will contain a number of indicators to define that risk. This configuration determines how many values each of those indicators have.
- The number of values in a risk indicator - 3 or 5
- Default - 3 Values

3 levels will set the value choices to be Low, Medium, High. Selecting 5 levels will set the values to be Very Low, Low, Medium, High, Very High. This will be reflected in a later screen in the Framework Setup and although the number is determined here, the values themselves can be edited in the later screen.
2.7 Risk Framework Setup - Screen 6: Define Risk Indicator Values
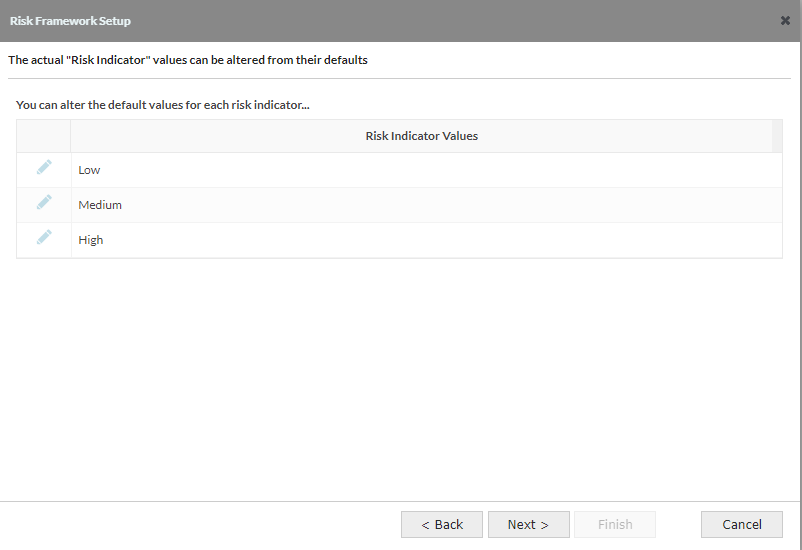
- Risk Indicator Values: Default is Low, Medium, High (the number of values is determined in the previous screen)

The values can be edited here and all Risk Indicators created will have these values but it is possible to rename, add or delete on individual indicators once the application has been created.

2.8 Risk Framework Setup - Screen 7: Generate Template
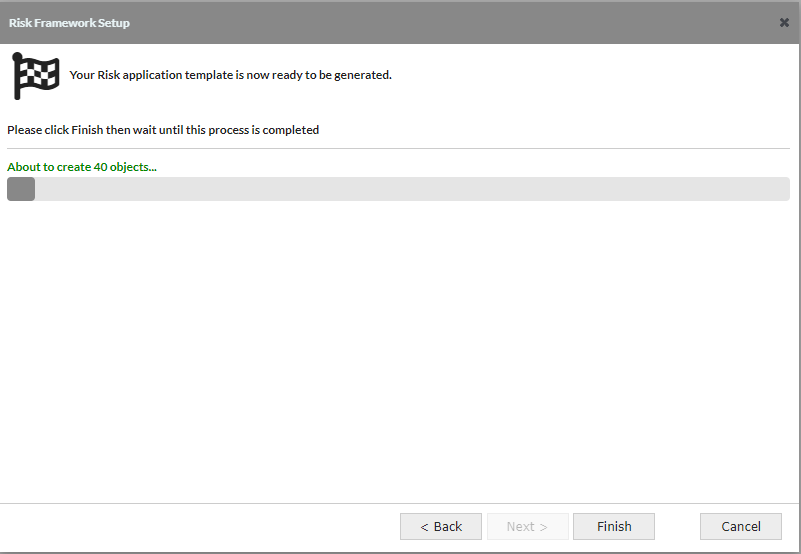
- This is the final screen which provides a summary of the number of objects to be created. These included all functions across all levels and the indicators to go with them. The number of objects to be created will depend on the configuration chosen, but to avoid creating unmanageable knowledge bases there is a 1000 object limit. The default settings will result in a knowledge base of 40 objects and should take less than a minute to generate.

2.9 Risk Framework Setup - SME Loan Tutorial
-
Now that you have seen how the different screens relate to building an application, just use the defaults to build the Loan Application:
-
Set Aggregation Levels & Functions (use defaults)
-
Click "Next"
-
Set Risk Rating Scale (use defaults)
-
Click "Next"
-
Set Risk Rating Scale values (use defaults)
-
Click "Next"
-
Risk Indicators (use defaults)
-
Click "Next"
-
Risk Indicator values (use defaults)
-
Click "Next"
-
Click "Finish" to create the 40 objects
-
-
You are now set to customise this basic application framework

