Part 5: Completing the Knowledge
5.1: Populating the Decision Tables
The Risk model structure has now been completed, this is where an expert would now populate all the decision tables to complete the knowledge. To understand how to complete one of the tables the "SME_Loan_Risk" is used as an example
-
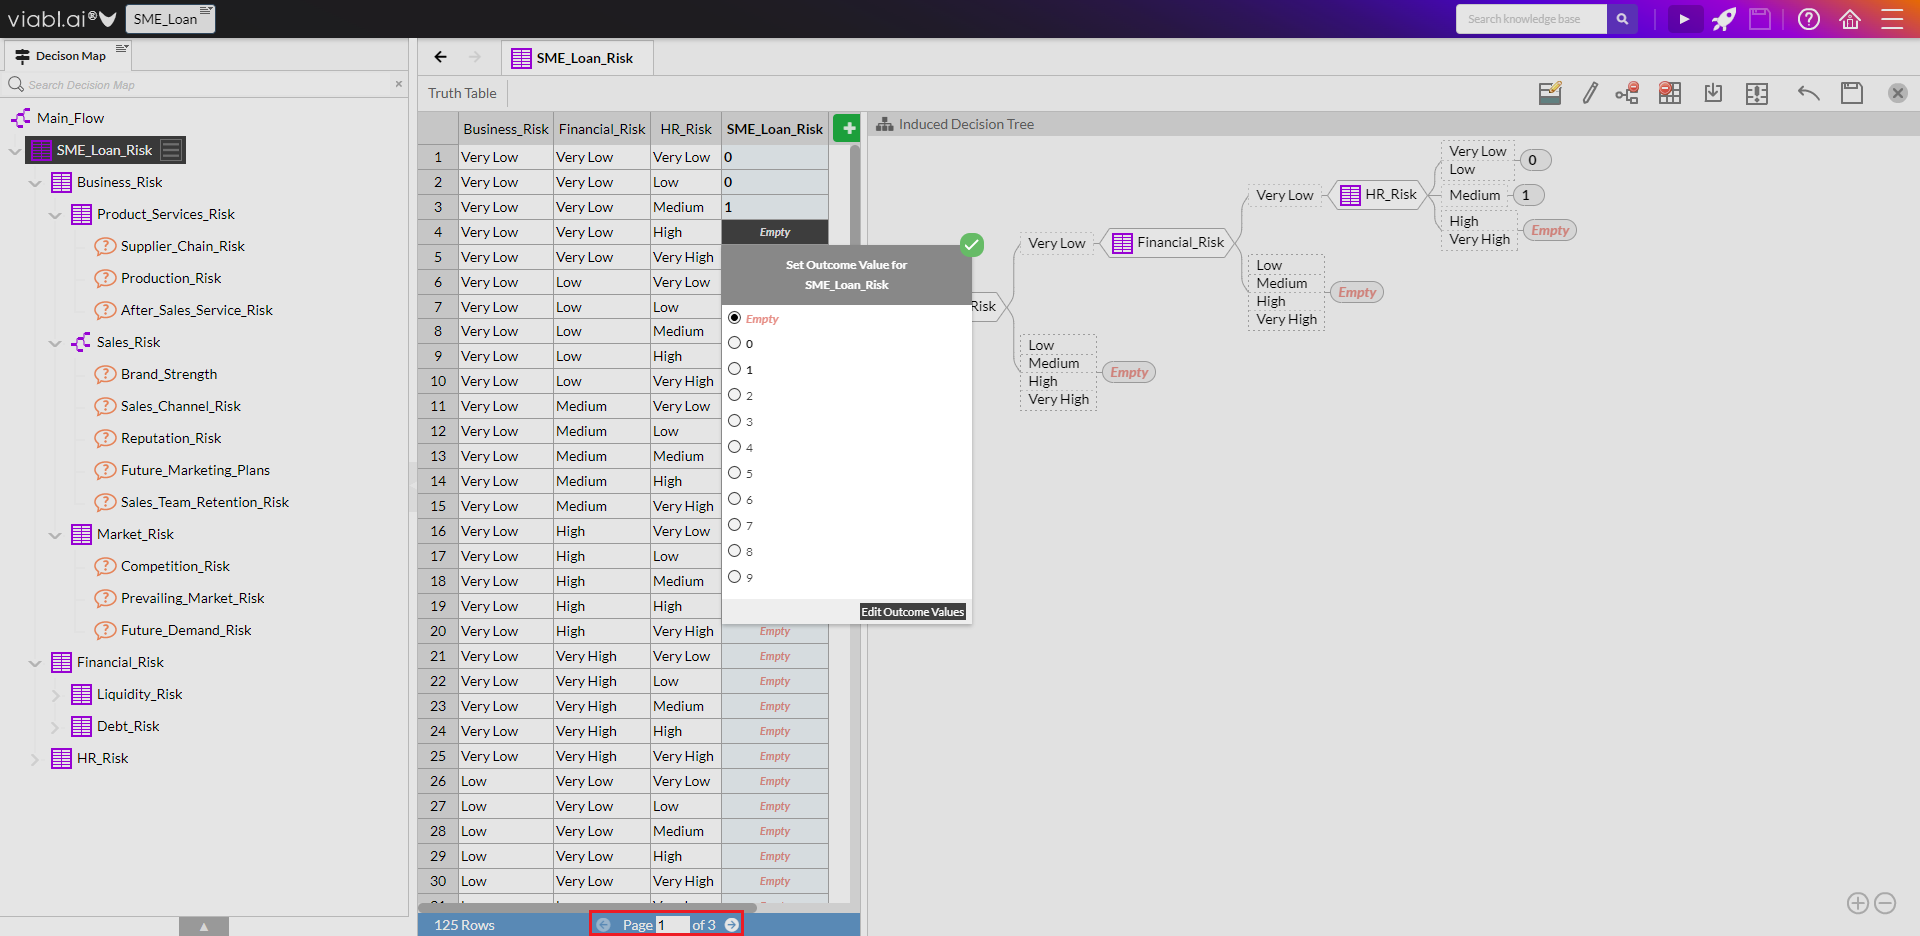
Double click on "SME_Loan_Risk" to set overall risk now that the framework has been built
-
To set an individual row click "Empty" on that row and select a value between "0" and "9".
-
Truth tables with a large number of rows are divided into a number of page views which can be accessed at the bottom of the editor


5.2: Running the Tutorial
5.2.1
This step is optional as it requires all the tables in the Decision Map to be completed in a similar manner to 5.1 above. One quick way to complete a table is by using the 'Induced Decision Tree' view of the Decision Table editor (the right-hand view of the editor). * On the 'Induced Decision Tree' select the 'Empty' leaf (or if some of rows have already been set from 5.1 above then select the first object in the 'Induced Decision Tree' view) which will highlight all the rows in the table. * Right-click in the highlighted area of the rows to bring up a popup menu 'Set Outcomes' and simply hover over the menu pointer to obtain a list of possible outcomes from which to select; whichever outcome is selected will be assigned to the highlighted rows. * Exceptions to this 'default' outcome can be obtained by setting outcome values of individual rows or groups of rows. Groups of rows can be highlighted by clicking the row number and then whilst holding the 'Shift' key clicking another row number - this will highlight all the rows between the two row number and then by right-clicking in this highlighted area the 'Set Outcomes' popup menu can be used to assign the group a particular outcome value.

5.2.2
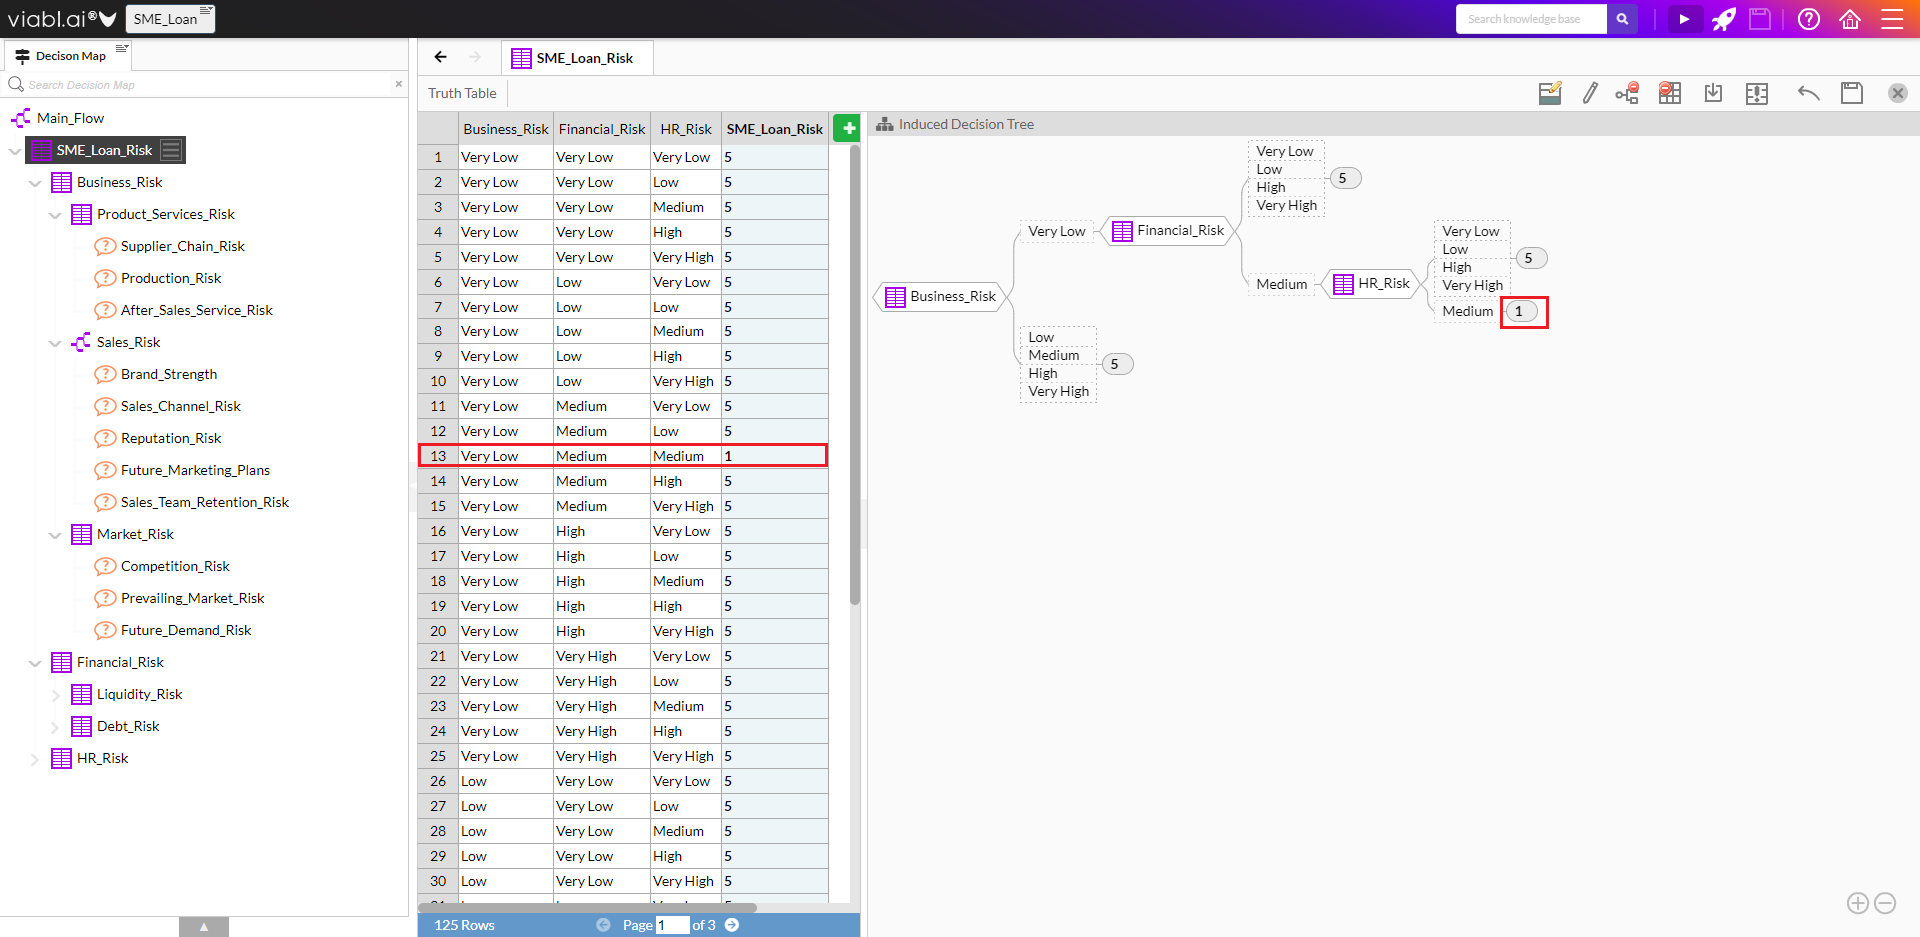
For the SME_Loan_Risk table set the 'default' outcome to be "5" (using the 'Induced Decision Tree' approach above) and then set the outcome of row 13 to "1".

5.2.3
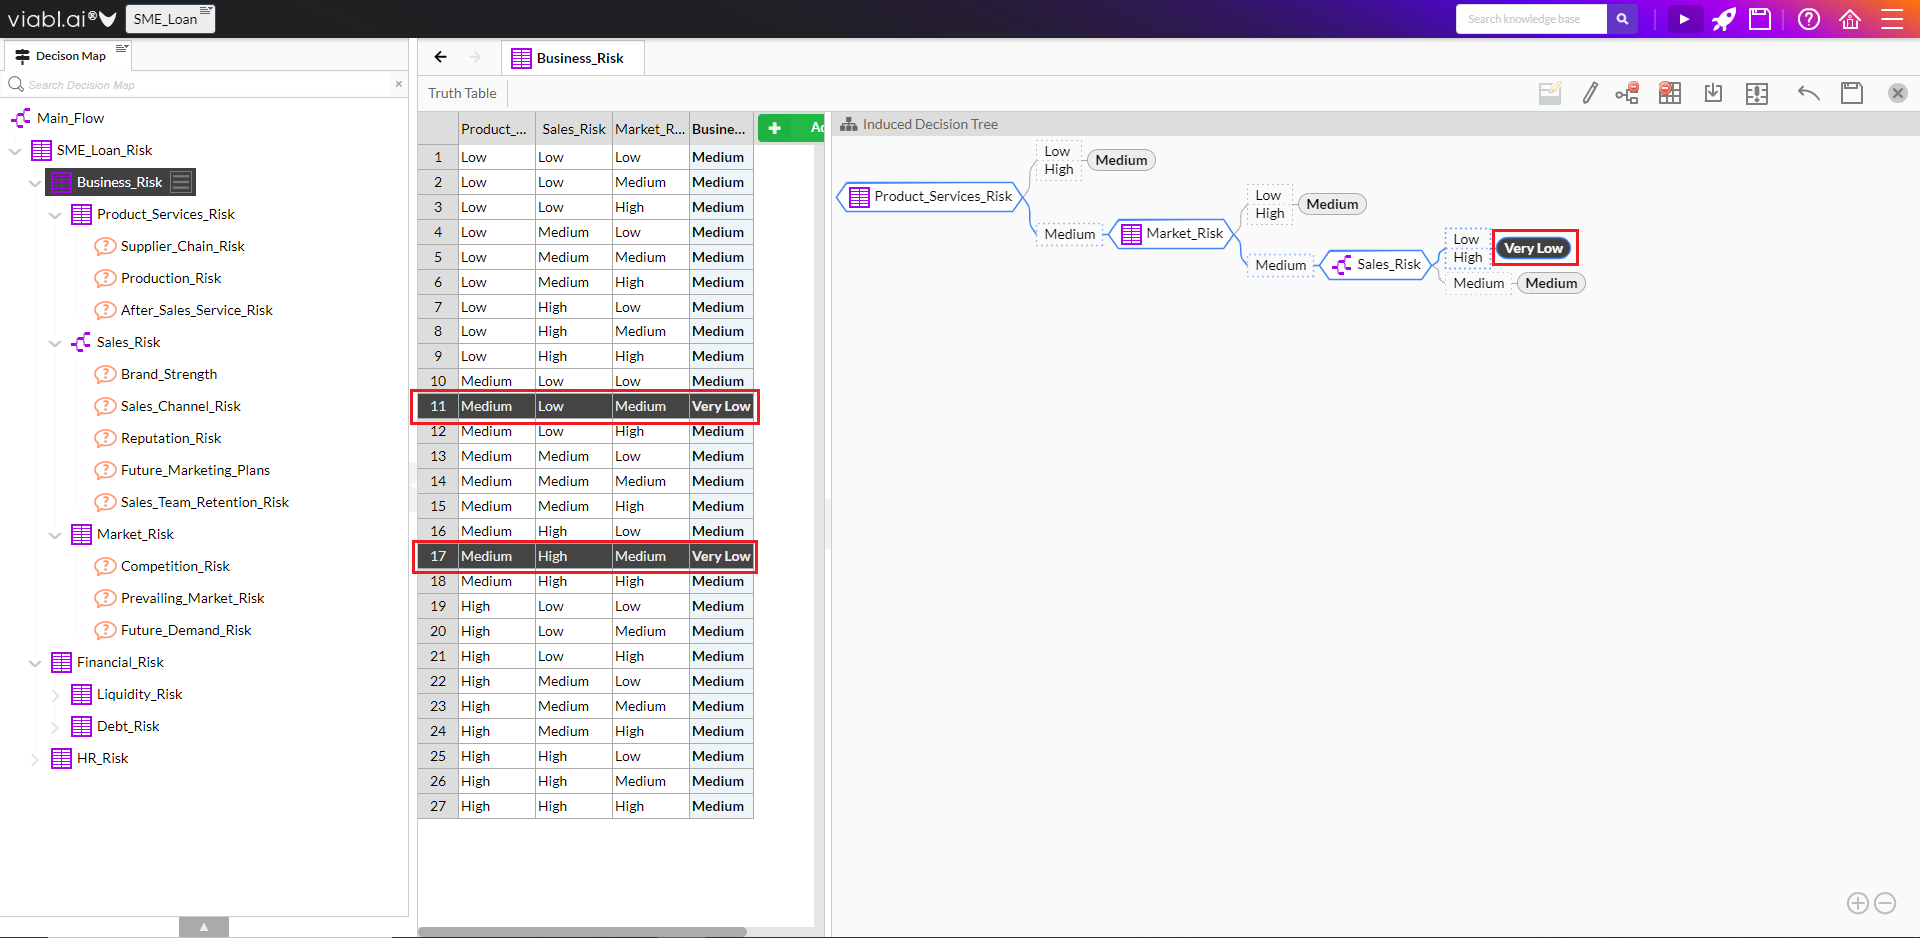
For the Business_Risk table set the 'default' outcome to be "Medium" (using the 'Induced Decision Tree' approach above) and then set the outcome of row 11 & 17 to "Very Low".

5.2.4
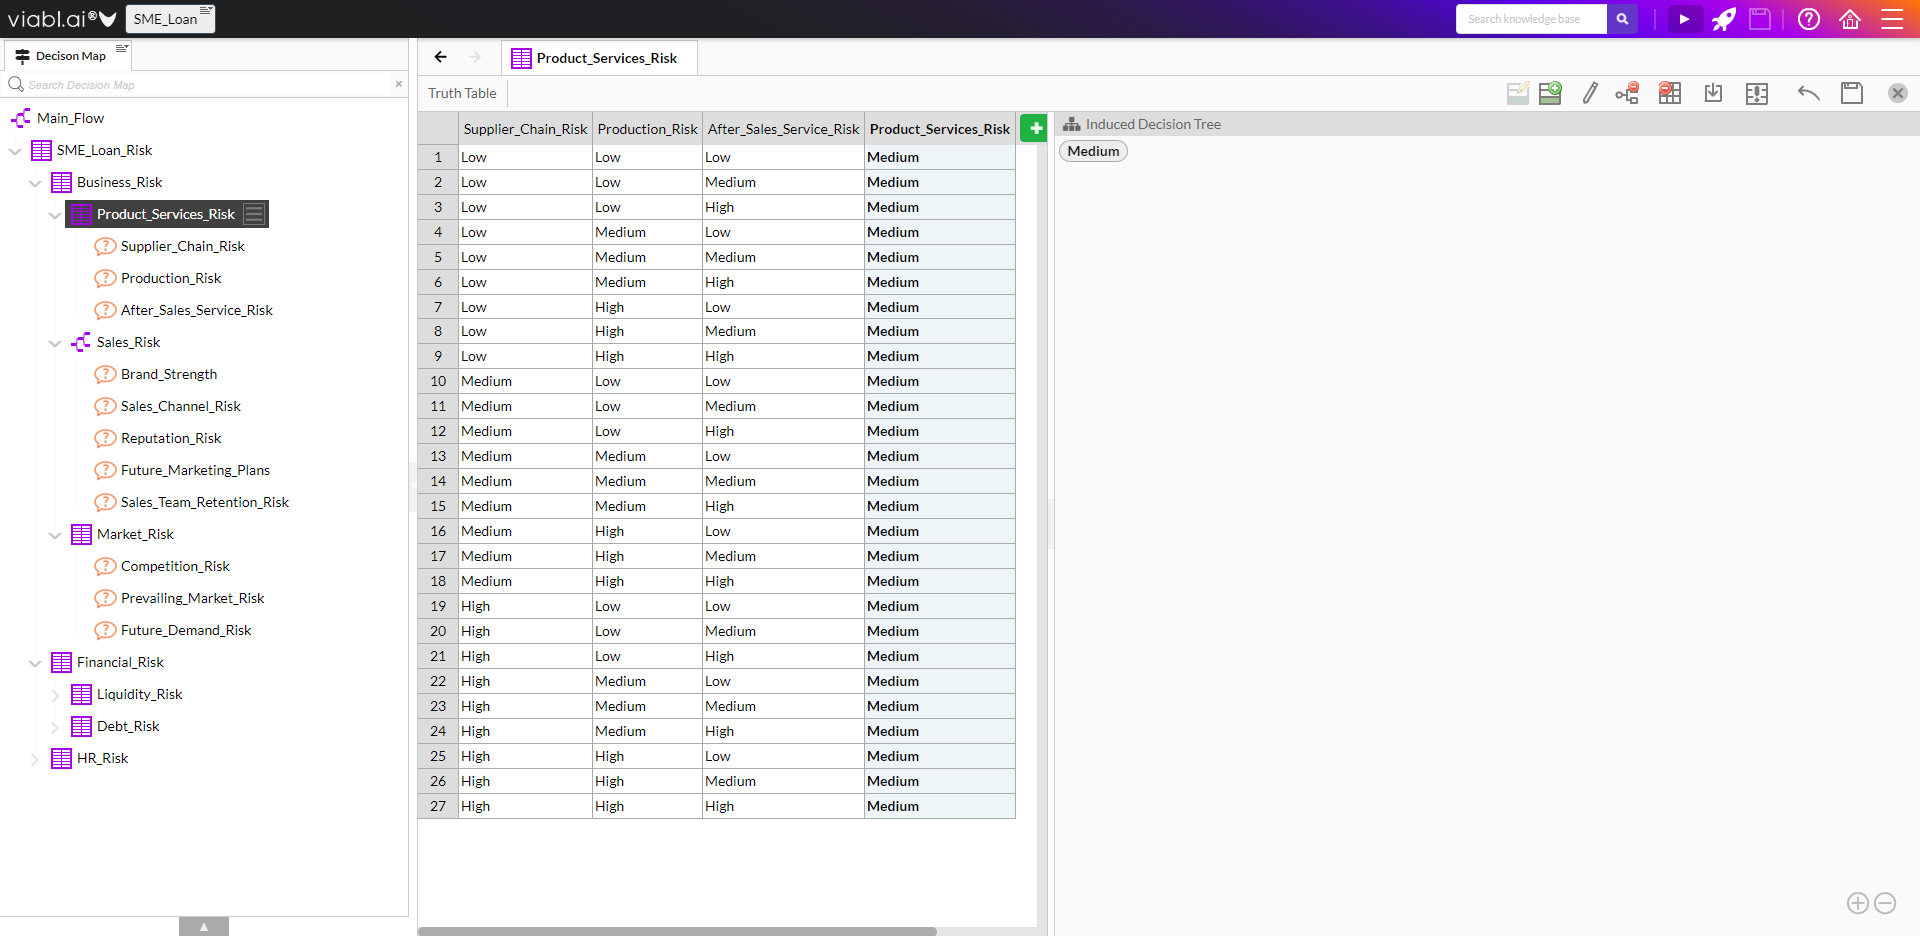
For the Product_Services_Risk table set the 'default' outcome to be "Medium" (using the 'Induced Decision Tree' approach above).
Do this for ALL the remaining tables - Market_Risk, Financial_Risk, Liquidity_Risk, Debt_Risk, HR_Risk.

5.2.5
A report is needed to display the aggregated risk.
- Double click the Main_Flow tree in the Decision Map
- Right-click on the “Done” node on the Main_Flow tree editor (or click on the burger menu next to Done) and select Add a New User Interface Object... then Add a Report
-
Follow the instructions on each page to complete the process of creating a new Report object:
- Enter Text: “The risk score is {SME_Loan_Risk}”
- Enter Name: “Risk_Report”
- Select Category: “Questions & Attributes”
-
Save and Run
-

5.3: Tutorial Recap
What hopefully has been learnt...
- How to use the Risk Framework Setup
- Understand the approach to building Risk Assessment applications
- Using the Decision Table editor and its optional 'Induced Decision Tree' view
- Understand the fast development through incremental build, save and test run