Part 3: Create a Dialog application to capture Employee Inputs and Add a new Case
In the first part of this tutorial a working Expenses application was converted into a silent application that requires inputs to process the expense request. In this section a dialog application will be created to capture those inputs and a new case created which can be a persistent store for those case related inputs.
3.1 Creating your knowledge base
- To create a new knowledge base click on the green + icon on the bottom right side of the page.
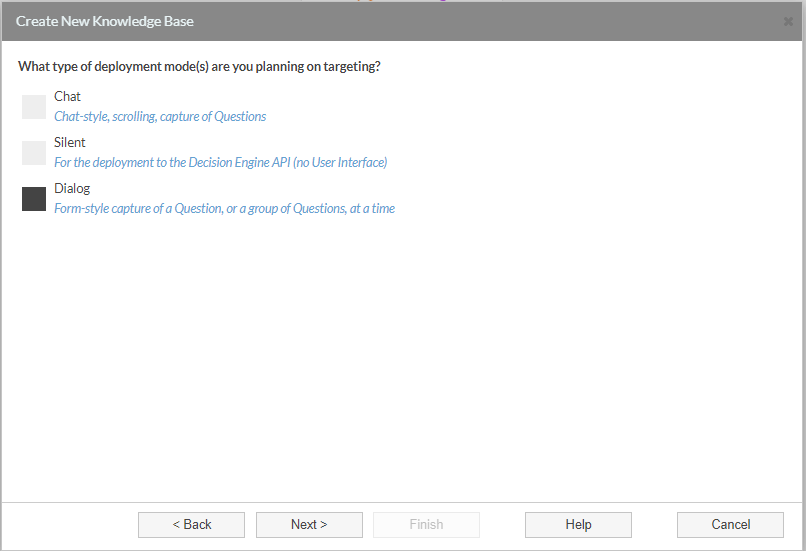
- Select the template: "General knowledge base"
- Select the deployment mode: "Dialog"
- Enter the new knowledge base name: "Employee Expense Request"
3.2 Create a Global Constant
- Open the Build Tools, Under the Advanced tools category, select Add a new global constant.
- Follow the instructions on each page to complete the process of creating a new Global Constant:
- Enter Name: "SolutionID"
- Description: ""
- Select Category: "Questions & Attributes"
- Type: "Text"
- Click Next
- Value: Paste in the Solution ID created in the deployment Server e.g. 8677f426-6e8b-43ba-9ea7-f03338a178d2
3.3 Import Objects from Process Expense Application
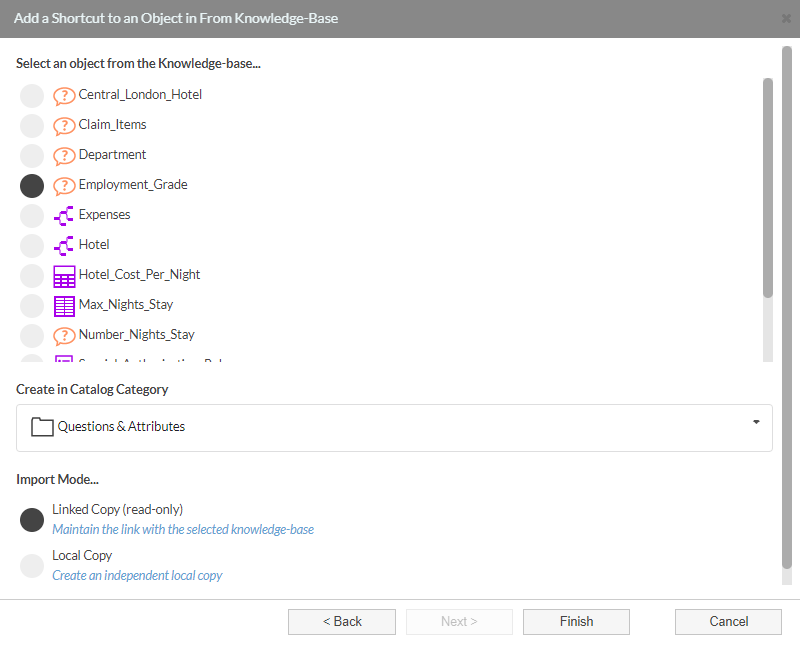
- Open the Library Category in Build Tools and double-click "Add an Object Shortcut"
- Follow the instructions on each page to import an Object
- Select knowledge base "Process Expenses"
- Select Object: "Employment_Grade"
- Select Category: "Questions & Attributes"
- Import Mode: "Linked Copy (read-only)"
3.3.1 Repeat for the following Objects
- Go to Recently Used Category in Builds Tools and repeat the process for the following Objects
- Department
- Total_Hotel_Cost
- Number_Nights_Stay
- Central_London_Hotel
- Claim_Items
3.4 Create two new Objects
- Right-click on Questions & Attributes Category in the Object Catalog and select Add a New Question
- Follow the instructions on each page to create the Object
- Enter Name: "Email_Address"
- Description: "Please Enter your Email Address"
- Select Category: "Questions & Attributes"
- Select Type: "Text"
- Follow the instructions on each page to create the Object
- Enter Name: "Name"
- Description: "What is your Name"
- Select Category: "Questions & Attributes"
- Select Type: "Text"
3.5 Building your Main_Decision_Flow tree
3.5.1 Create a Dialog
From within the Main_Decision_Flow Tree editor:
- Right-click on the "Done" node and Add a New User Interface Object... then Add a Dialog
- Name: "Expenses_DLG"
- Description: ""
- Category: "Dialogs & Reports"
- Template: "Master_Dialog_Template"
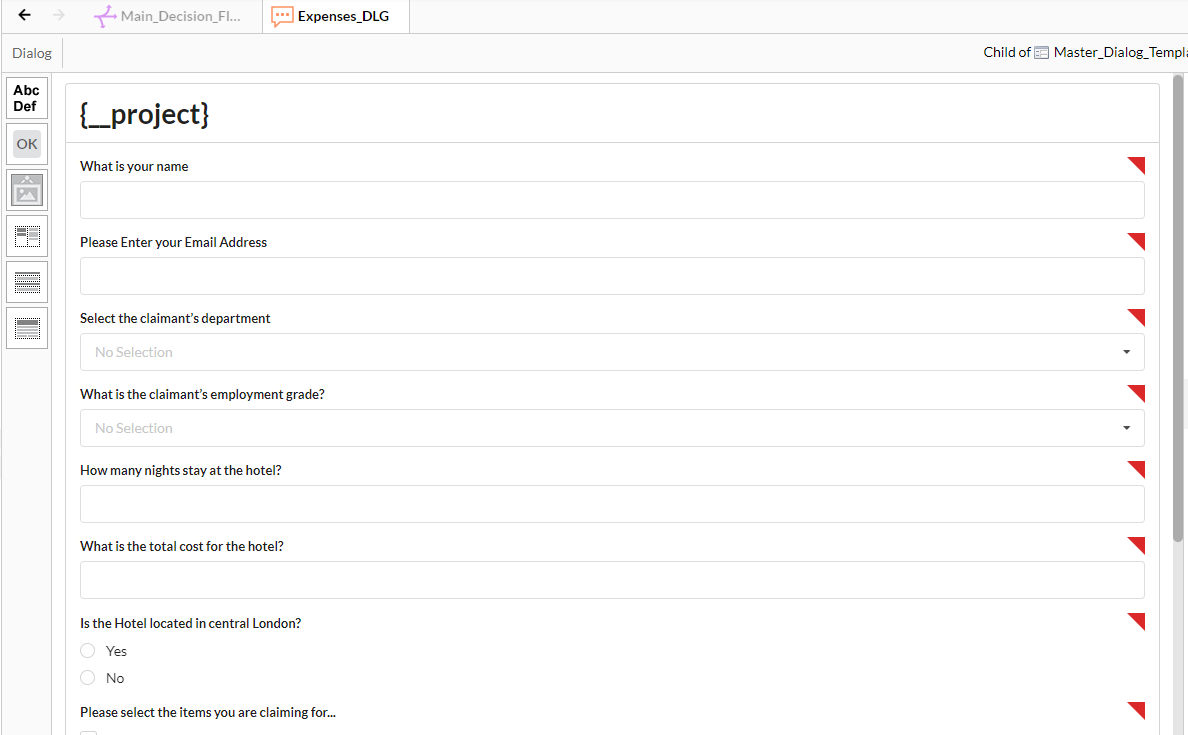
- Open the Dialog and Drag on the following objects
- Name as a Text Box input
- Email_Address as a Text Box input
- Department as a Dropdown
- Employment_Grade as a Dropdown
- Number_Nights_Stay as an EditBox
- Total_Hotel_Cost as an EditBox
- Central_London_Hotel as a ListBox
- Claim_Items as a ListBox
3.5.2 Save and Test Run
- Click the Save icon on the Dialog editor
- Press F9 or click the Test Run button.
- You should now see the Dialog with all the objects dragged on
- Close this tab and go back to the viabl.ai Platform tab

3.6 Create a New Case
3.6.1 Adding a case
From within the Main_Decision_Flow Tree editor:
- After the Dialog Drag in the "Add New Case" Build tool from the Case Management category
- Select Create New Object
- Name: "CaseID"
- Category: "Question & Attributes"
- Please supply a description for this case query operation: "Create New Case"
- Select: "SolutionID" for the Solution ID
- Case Status: "New"
- Update the payload to have the following
{ "Name": #Name.val(), "Email_Address": #Email_Address.val(), "Department": #Department.val(), "Employment_Grade": #Employment_Grade.val(), "Number_Nights_Stay": #Number_Nights_Stay.val(), "Total_Hotel_Cost": #Total_Hotel_Cost.val(), "Central_London_Hotel": #Central_London_Hotel.val(), "Claim_Items": #Claim_Items.val() }
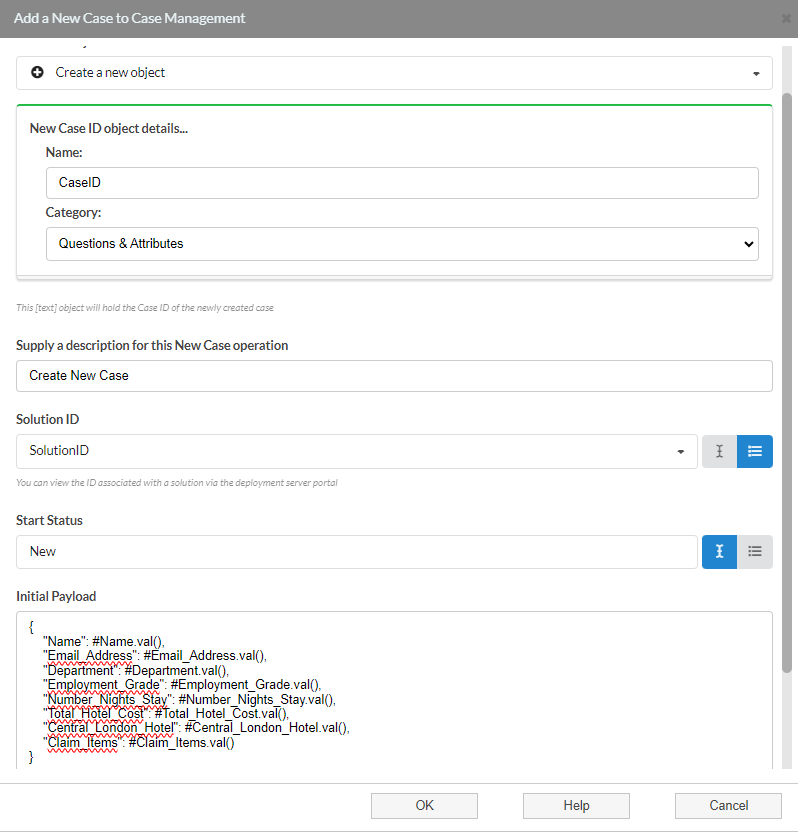
You have now created an application that can create a new case with all the parameters required to authorise or reject an Expenses claim.
3.6.2 Save and Test Run
- Click the Save icon on the Decision Tree editor
- Save the application
- Press F9 or click the Test Run button.
- In the Dialog populate with the following values
- Your name
- Your email address
- Department: "Sales & Marketing"
- Employment Grade : "Senior Manager"
- Number of Nights stay: "2"
- Total hotel cost: "150"
- Central London: "No"
- Claim items: "Food"
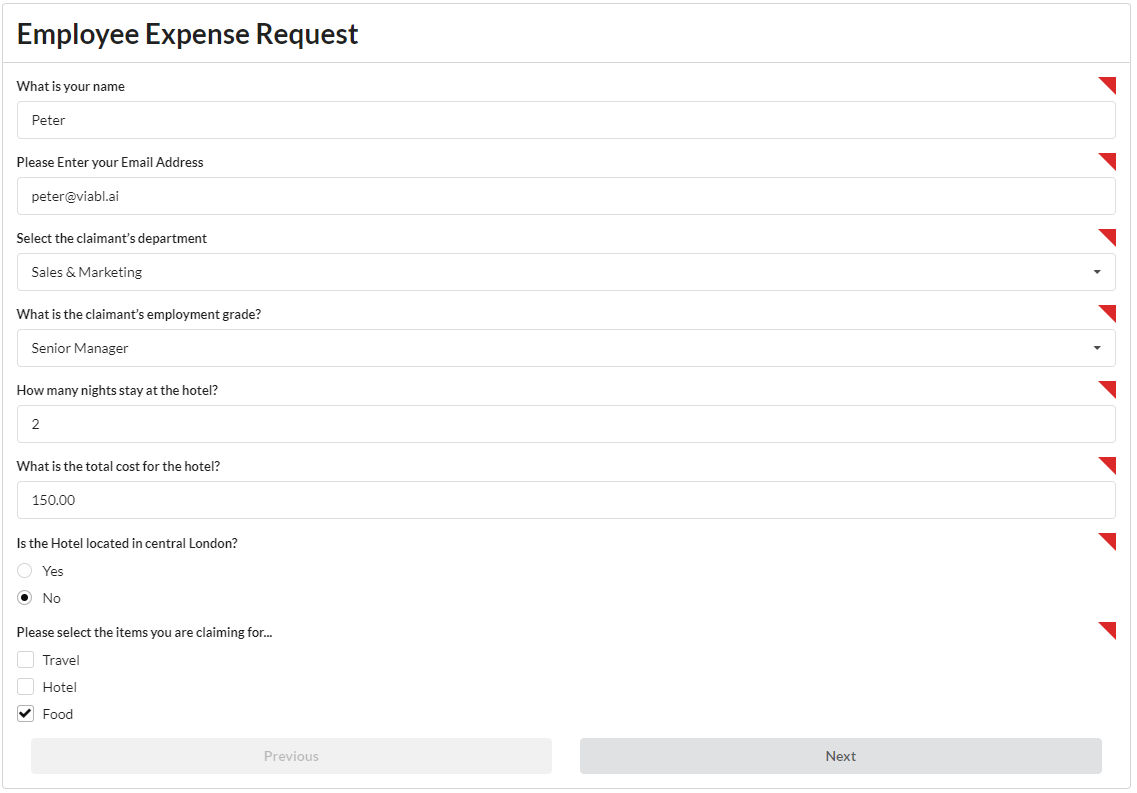
- Click next and then go and check the Cases tab in the deployment server, which can be accessed by the top right menu button
- Select your Expenses solution from the dropdown and hit the refresh button on the cases tab.
- You should see a new case, click on the case and a modal window will open where you can inspect the payload being sent.
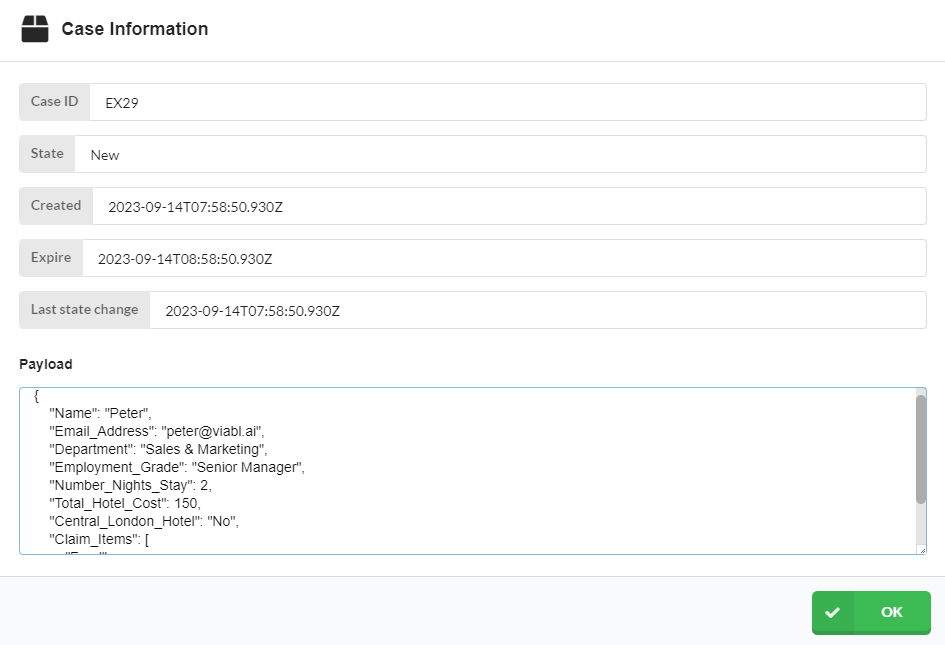
You have successfully created a Dialog application that creates a new case