Part 5: Introducing Case Status Management
In this section we will extract the case's payload, process the case using the existing logic and then update the case Status to as whether the case has been approved, rejected or escalated.
5.1 Retrieve Pay load
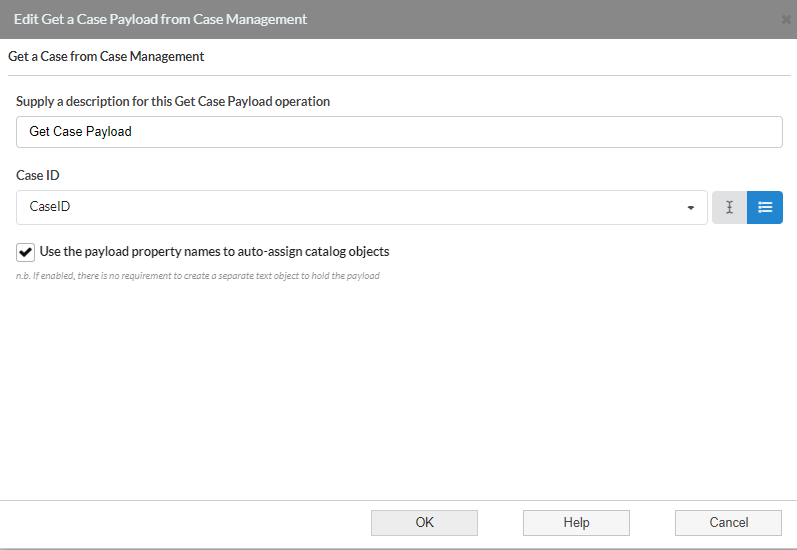
- Open Process_Case and Drag in the "Get Case Payload" Build tool onto Expenses
- Description: "Get Case Payload"
- Case ID: select CaseID
- Check the payload property check box to automatically map payload entries to existing objects
5.2 Set Case Status
There are several places where the case's status should be updated
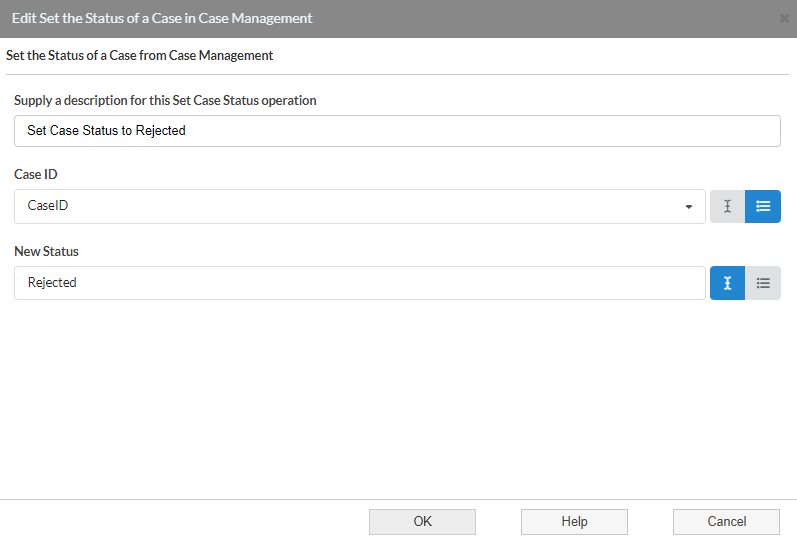
- On the Reject branch of expenses Drag on the Set Case Status Build Tool
- Name: "Set Case Status to Rejected"
- Case ID: "CaseID"
- New Status: "Rejected"
- On the "equal to" branch of "Special_Authorisation_Rules" Drag on the Set Case Status Build Tool
- Name: "Set Case Status to Approved"
- Case ID: "CaseID"
- New Status: "Approved"
- On the "Otherwise" branch of "Special_Authorisation_Rules" Drag on the Set Case Status Build Tool
- Name: "Set Case Status to Escalated"
- Case ID: "CaseID"
- New Status: "Escalated"
It is good practice to also set the Case to a working state as soon as the payload is received, as there may be many actions between retrieving the payload and the final status update. This was this case won't be repeatedly removed from the case array as "New"
- On the "Get Case Payload" object Drag on the Set Case Status Build Tool
- Name: "Set Case Status to Working"
- Case ID: "CaseID"
- New Status: "Working"

5.3 Testing
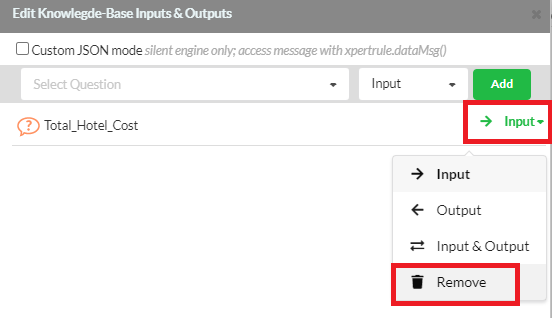
Now that the inputs are provided by the payload and the case status is updated via the application the inputs and outputs can be removed.
5.3.1 Remove Inputs and Outputs
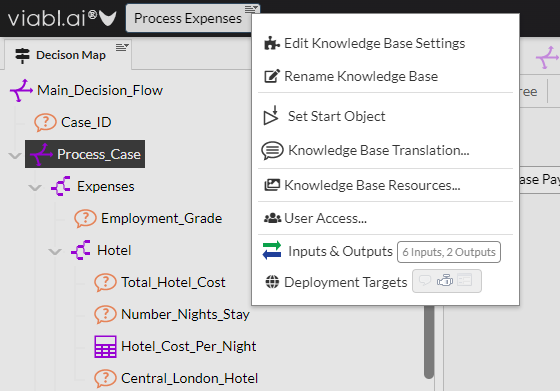
- Click the small burger menu and click on Inputs and outputs
- Delete all inputs and outputs
5.3.2 Save and Test Run
- Click the Save icon on the Report editor
- Press F9 or click the Test Run button.
- Run the application from the test page
Running the Process Expenses application will take the New Case created previously, process it and set the Status to the appropriate value, either Approved, Rejected or Escalated.

5.4 Silent engine running periodically
As the Process Expenses application picks up the oldest New Case every time it runs, it should be running periodically e.g. every 60 seconds, that way it runs automatically and doesn't need to be executed in a test run.
To do this the application needs deploying and then the auto-run settings changed.
5.4.1 Deploying the silent engine
So far test run (F9) has been used, to deploy this application to it's own application ID so it can be run periodically do the following
- Click the Rocket icon on the top right of the editor
- Click the green icon to deploy and an app ID will be created
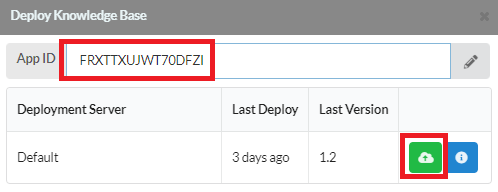
- Go the to Application tab of the Deployment server, refresh and locate the deployed application by name and app id
- Click on the application and a modal window will appear
- Click on the Auto-run Settings
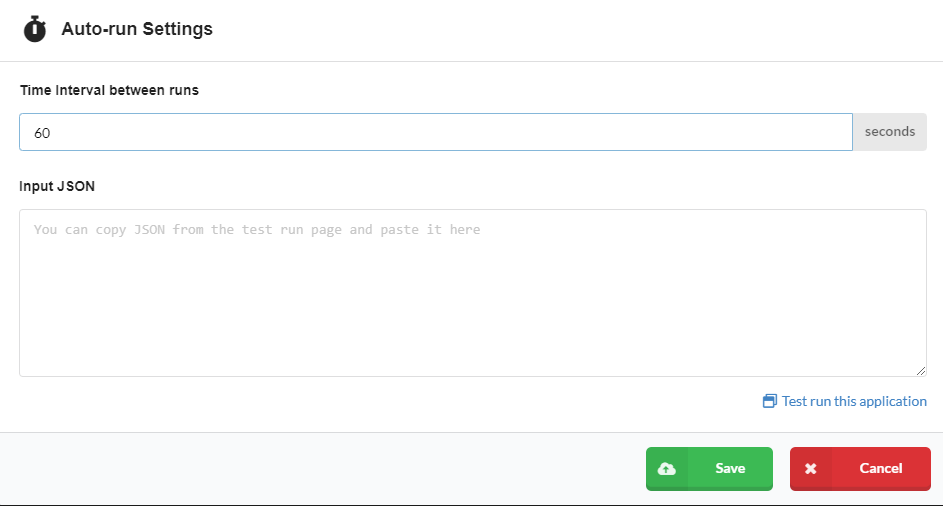
- Enter a run interval of 60 seconds
- Once saved, enable auto-run

5.4.2 Test auto-run
- Open the Employee Expense Request application in viabl.ai and test run
- Populate the form and submit.
- Go to Cases tab in deployment server and check a new case has been created with a status of "New"
- Refresh cases tab after 60 seconds and check the status has been updated to Approved, Rejected or Escalated.
