Part 7: Complete with Email notifications
This final section will cover how to configure and customise emails so that the approver is notified of an escalated expenses request and the Employee is informed as to whether their request is approved or not.

- All emails will be sent from the Process Expenses application and there will be four potential emails being sent
- Approval Request Email
- Approved Email
- Rejected Email
1.1 Approval Request Email
Firstly we need to import the name and the email address of the employee making the request
- Open the Library Category in Build Tools and double-click "Add an Object Shortcut"
- Follow the instructions on each page to import an Object
- Select knowledge base "Employee Expense Request"
- Select Object: "Name"
- Select Category: "Questions & Attributes"
- Import Mode: "Linked Copy (read-only)"
- Repeat for Email address

- After the Create_Runtime_Task Drag on the Send an Email Build Tool
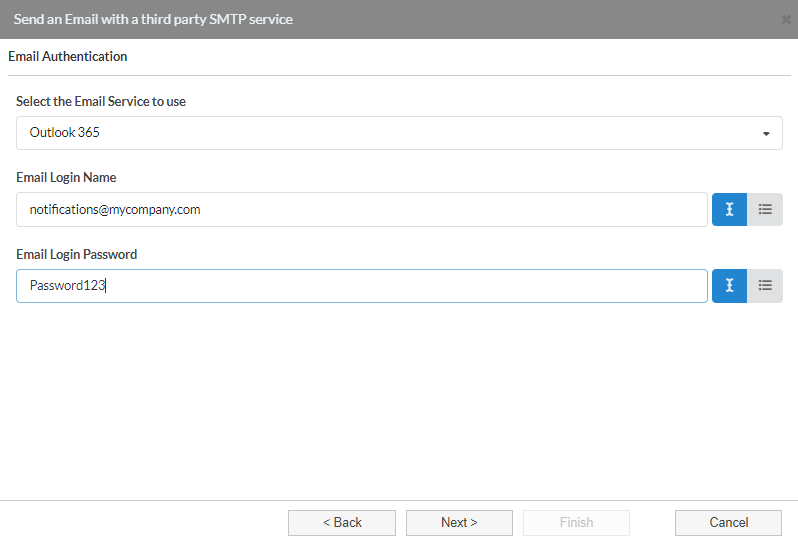
- Name: "Send_Approval_Email"
- Email Service: "Outlook 365" (whichever email service you use)
- Email: "notifications@mycompany.com" (who you are sending the email from)
- Password: "Password123" (both email and password can be stored in objects and selected here instead)
- Recipient Email Address : "manager@mycompany.com"
- Email Subject: " Expenses Approval Request"
- Split: "No Split"

1.1 Approved Email
- After the Set Case Status to Approved Drag on the Send an Email Build Tool
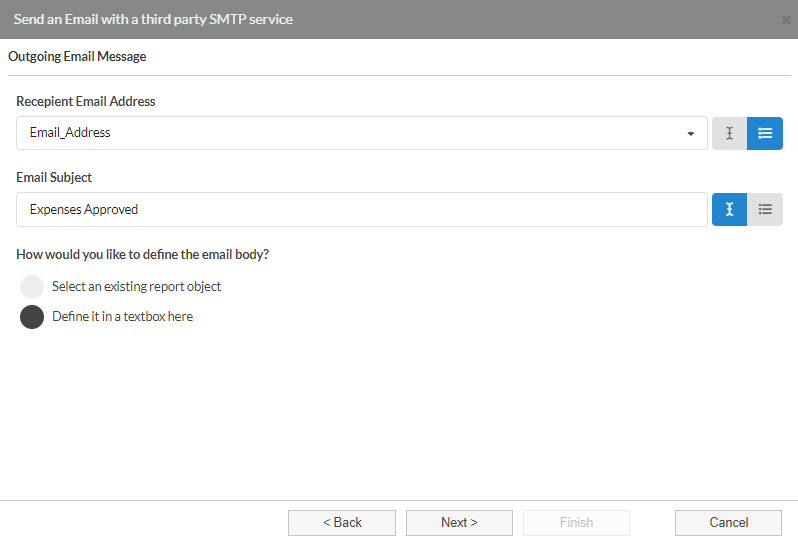
- Name: "Send_Approved_Email"
- Email Service: "Outlook 365" (whichever email service you use)
- Email: "notifications@mycompany.com" (who you are sending the email from)
- Password: "Password123" (both email and password can be stored in objects and selected here instead)
- Also enter in the following
- Recipient Email Address : "Email_Address"
- Email Subject: " Expenses Approved"
- Split: "No Split"

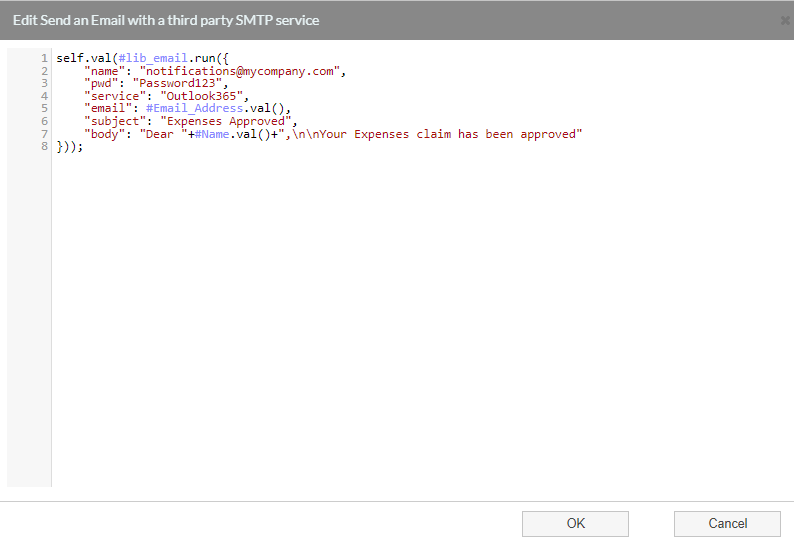
- Opening the advanced settings of the newly created object should show the following

1.2 Rejected Email
- After the Set Case Status to Rejected Drag on the Send an Email Build Tool
- Name: "Send_Rejected_Email"
- Email Service: "Outlook 365" (whichever email service you use)
- Email: "notifications@mycompany.com" (who you are sending the email from)
- Password: "Password123" (both email and password can be stored in objects and selected here instead)
- Recipient Email Address : "Email_Address"
- Email Subject: " Expenses Rejected"
- Split: "No Split"

1.3 Post Escalation Emails
When a case has been escalated, the manager will approve or reject and if rejected will provide a reason. These values will be uploaded to the case so the new payload must be retrieved
1.3.1 Retrieving Payload
- After the Workflow suspend, on the resumed branhc, Drag in the "Get Payload" Build tool
- Name: "Get Updated Case Payload"
- Case ID: select CaseID
- Check the payload property check box to automatically map payload entries to existing objects
1.3.2 Import Objects from Expense Request Review Application
There are two objects that have been updated in the payload that don't yet exist in this application, they must be linked to using the library build tool
- Open the Library Category in Build Tools and double-click "Add an Object Shortcut"
- Follow the instructions on each page to import an Object
- Select knowledge base "Expense Request Review"
- Select Object: "Approve"
- Select Category: "Questions & Attributes"
- Import Mode: "Linked Copy (read-only)"
- Repeat for Reason_For_Rejection
- After "Get Updated Case Payload" Add an Existing Object
- Name: "Approve"
- Split: "Multiway"
- On the "Approve" branch Add an Existing Object
- Name: "Send_Approve_Email"
- Split: "No-Split"
- On the "Reject" branch Drag on the Send an Email Build Tool
- Name: "Send_Rejected_Reason_Email"
- Email Service: "Outlook 365" (whichever email service you use)
- Email: "notifications@mycompany.com" (who you are sending the email from)
- Password: "Password123" (both email and password can be stored in objects and selected here instead)
- Recipient Email Address : "Email_Address"
- Email Subject: " Expenses Rejected"
- Split: "No Split"
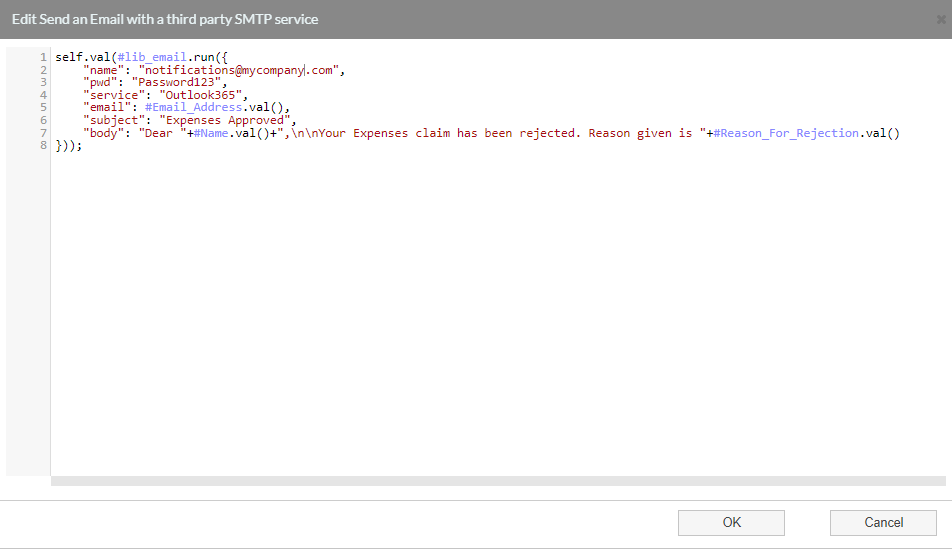
The body should be as follows"
"body": "Dear "+#Name.val()+",\n\nYour Expenses claim has been rejected. Reason given is "+#Reason_For_Rejection.val()


You have now completed the tutorial.